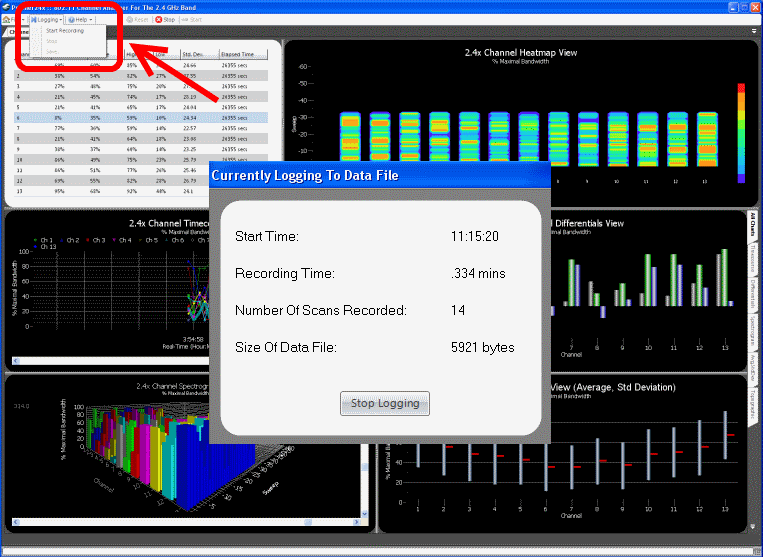
Profiler24x features a simple, yet powerful, data logging capability. Data files that are recorded can later be viewed using a built-in playback feature. To begin recording select Logging -> Start Recording from the main menu (see figure below). A dialog box titled 'Currently Logging To Data File' appears to remind you that recording has been enabled. When done recording you can either select Logging -> Stop or Logging -> Save, which will allow you to save the recorded data to a file. The recorded data is saved in XML format -- not only is it human-readable but, also, the format of the data is clearly laid out and accessible if you wish to write additional scripts to manipulate the results or search for patterns in the data.
NOTE: When Logging -> Start Recording is selected (and before recording actually begins) the application first checks for a minimum of 300 MB of free disk space on the drive on which the Profiler24x application was installed. This would allow for over 24 hours of continuous recording. If sufficient disk space is not available then a warning message is displayed.
Playback mode is accessed by selecting the 'View Recording' tab (as shown below). In Playback mode the background color of the application changes to silver and certain features along the main menu bar are disabled.
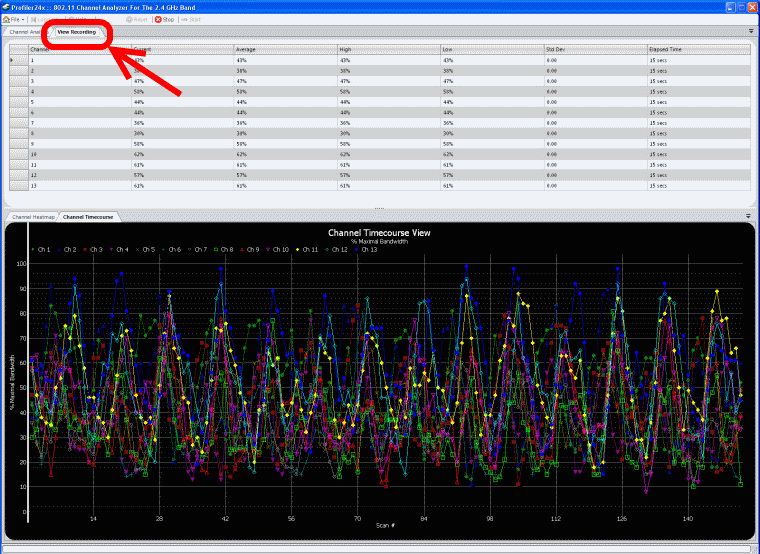
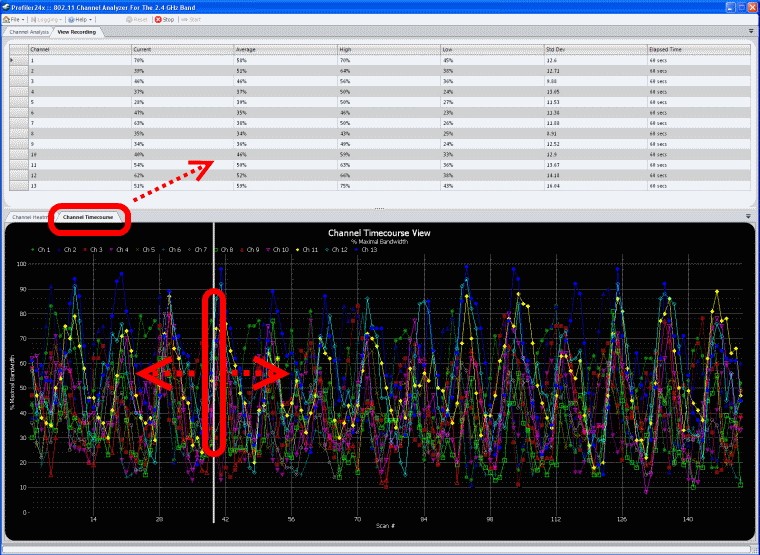
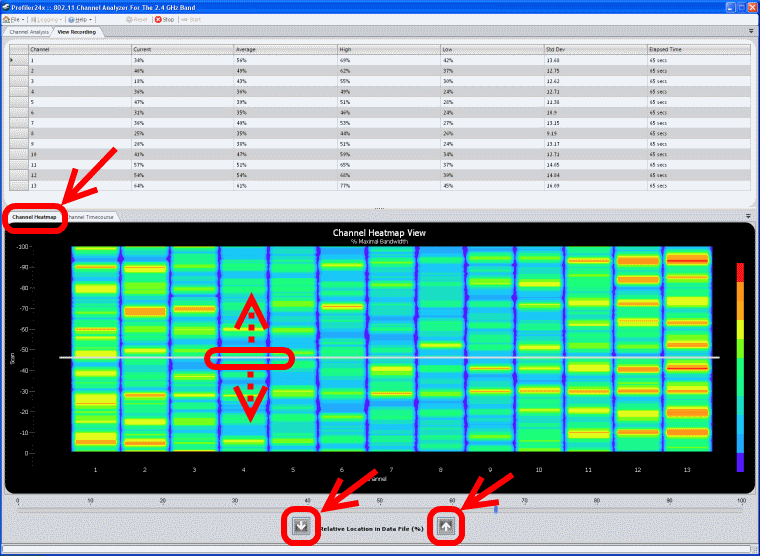
To open and view a recorded data file, select File -> Open Recording File... from the main menu. Once the data has been read by the application then the upper Statistics grid and lower Channel Heatmap and Channel Timecourse charts will be updated. Other record/playback programs follow a tape-recorder model, requiring the user to press a Play button and then sit and watch while data scrolls by. This can be tedious and time-consuming, especially if you simply want to scan through the data and look for interesting events. Profiler24x implements a different approach which we refer to as 'History Tracking'. From the Channel Timecourse chart, using the left-mouse button to drag the tracking line left or right will cause the statistical data displayed in the grid to be updated. Similarly, from the Channel Heatmap chart, dragging the tracking line up or down will update the statistical grid. The data reported in the statistical grid corresponds with that point in time indicated by the tracking line.
At the bottom of the Channel Heatmap chart are two buttons with up and down arrows. The Heatmap chart displays 100 scans at a time -- if your recorded data is larger then the Up and Down buttons provide a means to scroll through the data to view the next or previous 100 scans.
Copyright © 2010, Nuts About Nets, LLC