Standalone Diagnostic Tool
|
or
|
Welcome to the WifiBuilder Series of 802.11 Wireless Network Diagnostic Tools...
This Installation Guide provides basic instructions for installing the WifiBuilder diagnostic AP along with Figaro -- a utility for configuring the WifiBuilder AP.
System Requirements for Installing and Configuring WifiBuilder
• PC running Windows XP Professional (SP3), Windows Vista, Windows 7 (32- or 64-bit)
• Microsoft .NET Framework version 3.0 (or later)
• An available LAN port for connecting your PC to the WifiBuilder AP via ethernet cable. If your PC has only a single LAN adapter then a second adapter can easily be added using a USB-to-ethernet adapter.
Hardware Components
• WifiBuilder diagnostic access point (e.g. Cisco / Linksys Model No. WRT400N) with custom Linux image supplied by Nuts About Nets, LLC.
Preliminaries
• You will need administrative privileges in order to configure the network interface that connects to the WifiBuilder AP. Please login to an account on your computer that includes 'Administrator' rights before proceeding with the installation.
Step 1. Connect the WifiBuilder AP To Your Windows PC
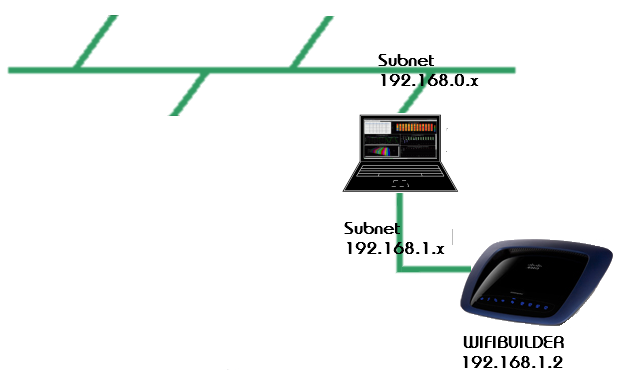
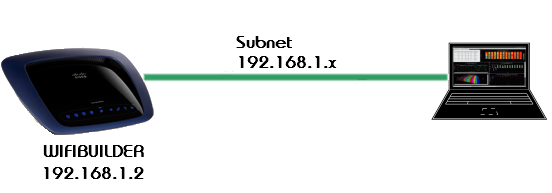
There is more than one way to connect the WifiBuilder AP to a PC. The description that follows is the one we recommend when using WifiBuilder as a standalone diagnostic tool. It presumes your PC has two LAN adapters -- one for normal Internet connectivity and the other used for direct attachment to the WifiBuilder AP. Furthermore, the LAN adapter used to connect WifiBuilder should be configured to use a different subnet than the one for normal Internet connectivity -- otherwise applications might be confused as to which adapter to use for normal network activity. In this simplest configuration the WifiBuilder AP is connected directly to a PC (i.e. is not connected to a network) and uses its own subnet.
Standalone Diagnostic Tool
|
or
|
Using a Cat5 ethernet cable connect the WifiBuilder AP to a LAN adapter on your PC. The ethernet cable should be attached to one of the 4 RJ-45 ports on the back of the WifiBuilder AP labeled 'Ethernet' (and NOT the port labeled 'Internet'). If your PC does not have an available LAN port then you can also use the 'USB to 10/100 Mbps Adapter' (optional accessory) that may have shipped with WifiBuilder and which provides an additional LAN port (and network interface). The default IP address (192.168.1.2) for the WifiBuilder AP will likely be on a different subnet than the network adapter used for your normal Internet connection, so it requires its own network interface. Also, we'll be configuring the local interface (the one connected to WifiBuilder) to use a static IP address.
Step 2. Configure the Local Network Interface To Use A Static IP Address
The description that follows uses Windows XP, but the procedure is very similar for Vista and Windows 7, too.
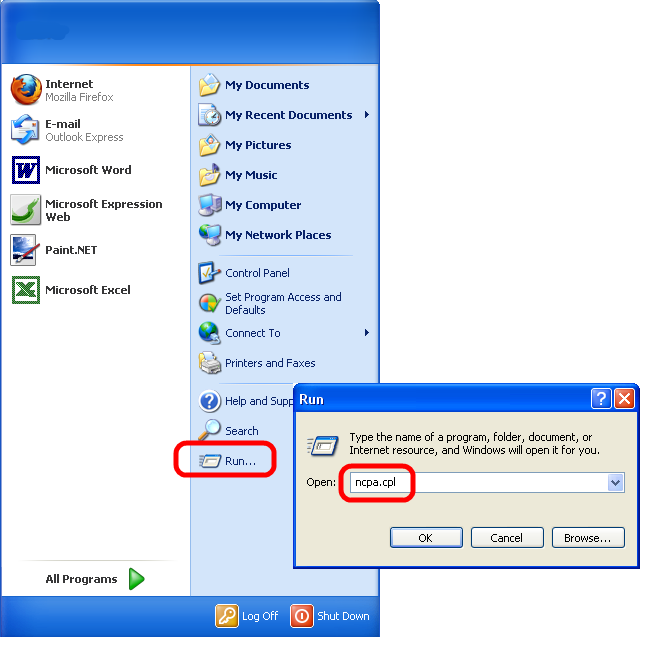
From the 'Start' button launch the Network Connections wizard by running 'ncpa.cpl'.
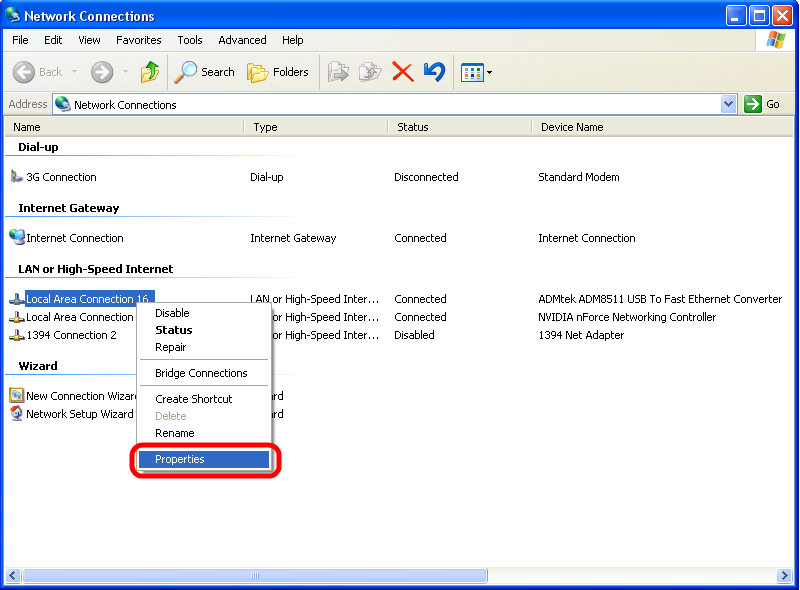
Select the network interface that is connected to the WifiBuilder AP, right-click and select 'Properties'.
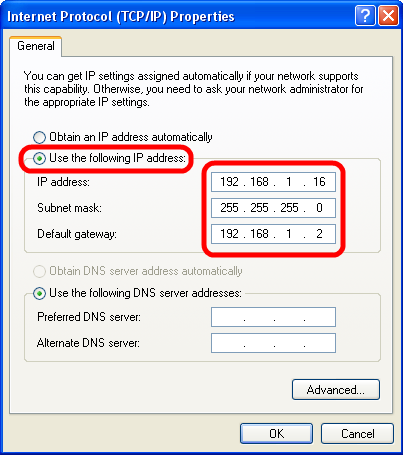
Under the 'General' tab, select Internet Protocol (TCP/IP) and click Properties.
This opens the Internet Protocol (TCP/IP) Properties dialog box. Under the General tab, select 'Use the following IP address' and enter the following values:
IP Address: 192.168.1.16
Subnet Mask: 255.255.255.0
Default gateway: 192.168.1.2
You can leave the other fields blank. When done, click 'OK' to close each dialog box.
NOTE: The Default gateway is the IP address of the WifiBuilder AP.
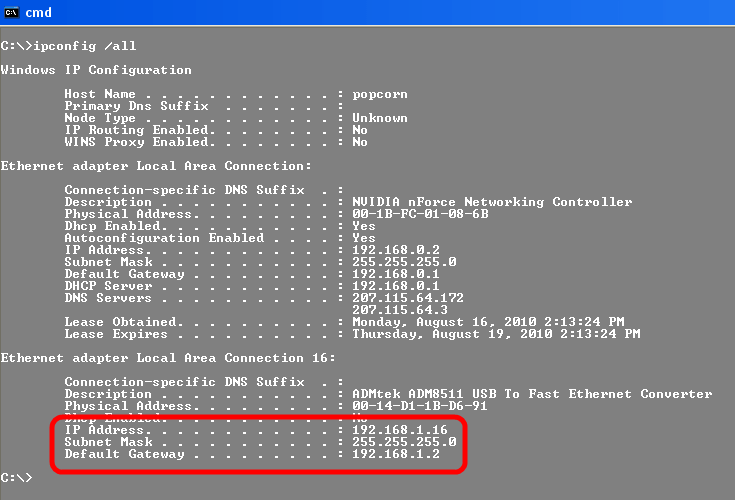
From the command line run 'ipconfig /all' to confirm that your changes have been applied.
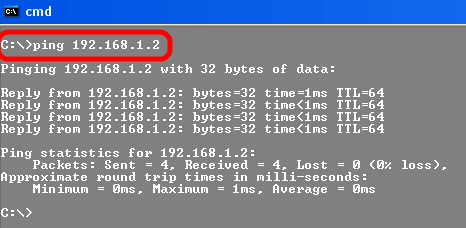
And, finally, from the command line confirm that you can ping the WifiBuilder AP using the IP address for the Default Gateway.
Copyright © 2010, Nuts About Nets, LLC